


Table of Contents
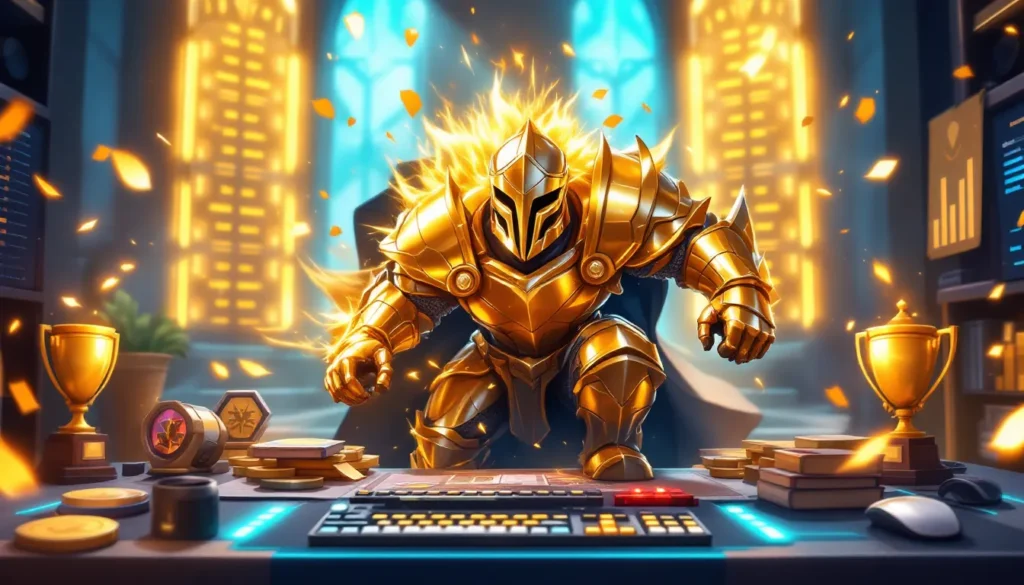
ToggleThe Golden Knight has completely reshaped the Clash Royale landscape since its introduction, and if you’re grinding mid-ladder in 2026, you’re going to run into it constantly. This card isn’t just another legendary, it’s a versatile powerhouse that works in control decks, beatdown strategies, and cycle-heavy builds alike. Whether you’re pushing ladder or preparing for war, understanding how to build around the Golden Knight can be the difference between stalling at 5500 trophies and breaking into the 7000+ range. This guide breaks down the card’s mechanics, the best deck archetypes, meta-busting synergies, and the strategies that’ll make you a threat in any matchup.
Key Takeaways
- The Golden Knight deck in Clash Royale is a versatile powerhouse that works across control, beatdown, and cycle builds, making it essential for climbing beyond 5500 trophies.
- Golden Knight’s unique dash ability provides a guaranteed first strike before opponents can counter, creating elixir-advantage trades that differ fundamentally from traditional Clash Royale cards.
- Pair Golden Knight with splash damage units like Wizard, Baby Dragon, or Executioner to maximize effectiveness and create resource-winning trades against swarm defenders.
- Inferno Dragon, Electro Giant, and spell-heavy control decks are the most reliable hard counters to Golden Knight, requiring strategic positioning to neutralize its momentum.
- Avoid deploying Golden Knight without backup support, cycling it too frequently without tempo advantages, and misreading dash placement—these mistakes waste the card’s premium damage output.
Understanding The Golden Knight Card
Card Stats And Abilities
The Golden Knight arrives with solid base stats that scale beautifully across ladder levels. At tournament standard (Level 9), it packs 1,200 HP, 185 damage per swing, and a deceptive 1.8-second hit speed. But here’s what makes it special: its dash ability. Once per engagement, the Golden Knight charges forward, covering ground and dealing 185 damage on impact, essentially a guaranteed first strike that catches defenders off guard.
Elixir cost sits at 6, making it mid-cycle to deploy but forgiving enough that a successful trade justifies the investment. The real damage output, though, isn’t raw DPS. It’s that dash ability triggering before your opponent can place a proper counter, which means you’re often ahead on elixir even though the initial cost.
Why Golden Knight Changed The Meta
Before the Golden Knight’s release, mid-ladder felt stagnant. You had your mega tank pushes, your cycle decks, your spell bait builds, all functional, but predictable. The Golden Knight shattered that predictability. It’s fast enough to cycle through your deck, bulky enough to tank chip damage and survive most mini-tank interactions, and that dash ability fundamentally changes how you approach elixir trading.
The card forced meta adjustments across the board. Controls decks now prioritize swarm units and grounded splash damage. Beatdown pushes evolved to include the Golden Knight as a secondary attacker rather than relying solely on a Golem or Giant. Even mini-cycle decks started incorporating it, because the tempo swing it generates is genuinely free value in many situations. Tournament grinders started seeing it at the top 200 climbs almost immediately after release, and it’s only grown from there.
Core Golden Knight Deck Archetypes
Control And Beatdown Variants
Control builds leverage the Golden Knight’s survivability and damage output to grind out longer games. You’re pairing it with defensive splash (Wizard, Executioner, or Baby Dragon) and cheap cycling units (Skeletons, Goblins, Ice Spirit). The Golden Knight becomes your primary win condition, supported by small troops that chip away while your opponent struggles to clear your board efficiently.
This archetype thrives against aggressive decks and swarm-heavy strategies. Your role isn’t to race your opponent, it’s to wear them down and convert a defensive advantage into a tower takedown in the final minute. Expect games to go to overtime frequently: that’s intentional.
Beatdown variants use the Golden Knight as a secondary attacker in larger pushes. You’ll see it paired with Golem, Pekka, or even Hog Rider depending on the specific list. The theory is simple: deploy a tank, support with splash, slide the Golden Knight into the lane once your opponent’s already committed to defense. By the time they can respond, they’re overextended on elixir.
Beatdown decks are greedier, requiring you to respect your opponent’s win condition early on. You’re often playing on the back foot until you establish a strong counter-push. The payoff is devastating when it lands, these pushes frequently result in tower breaks that win games outright.
Cycle And Bait Strategies
Cycle decks treat the Golden Knight as a sustainable win condition rather than a finisher. With low-cost spells (Arrows, Zap, Log) and quick rotation units, you’re cycling through your deck rapidly, redeploying the Golden Knight every other rotation. The goal is attrition, your opponent runs out of answers before you run out of pressure.
These lists typically run multiple cheap units (Goblins, Skeletons, Dart Goblin) and a defensive building or mini-tank. The Golden Knight becomes genuinely hard to answer when your opponent can’t guarantee a clean trade every 25 seconds. Popular cycle Golden Knight decks often include Musketeer or Electro Dragon as secondary threats to prevent pure hard-counter stacking.
Bait variants combine the Golden Knight with spell-magnet units. Inferno Dragon, Goblin Barrel, and Skarmy all force your opponent to choose between defending your primary threat or shutting down your baited units. The Golden Knight absorbs the defensive spell commitment, leaving your squishy threats uncontested.
This is where matchup knowledge becomes critical. Against decks with single-target spells, you can bait Fireball or Rocket with Inferno Dragon, then deploy the Golden Knight for a clean push. Against area-damage decks, you’re leaning on the Goblin Barrel and letting your opponent’s resources pool inefficiently. The flexibility is the entire point.
Best Golden Knight Deck Lists For 2026
Mid-Ladder Domination Decks
Golden Knight + Electro Dragon Control
- Golden Knight (primary win condition)
- Electro Dragon (secondary threat, air coverage)
- Wizard (splash damage, building destruction)
- Inferno Dragon (hard counter to Pekka/Golem)
- Goblins (cycle unit, building distraction)
- Skeletons (cheap defense)
- Zap (stun and cycle)
- Fireball (spell coverage)
This list dominates mid-ladder because it covers almost every matchup. Electro Dragon shuts down swarm decks while dealing sky-high damage from range. The Golden Knight cycles through frequently and profits from Electro Dragon’s stun ability. You’re lean on resources, forcing opponents into awkward decisions.
Golden Knight + Hog Rider Tempo
- Golden Knight (tank and damage)
- Hog Rider (secondary win condition)
- Baby Dragon (air support, splash)
- Goblin Gang (swarm counter)
- Musketeer (ranged damage, building killer)
- Log (swarm control, cycle)
- Arrows (cheap AOE)
- Ice Spirit (rotation, stun)
This is more tempo-focused. You’re using the Golden Knight and Hog Rider in separate lanes to spread your opponent’s defense thin. The cost sits lower overall, letting you out-cycle greedier decks. Musketeer handles air threats while surviving most small spells, and the sheer speed of deployment means your opponent is constantly reactive.
Ladder Push And Competitive Builds
Golden Knight + Goblin Barrel Mirror Bait
- Golden Knight (tank)
- Goblin Barrel (bait spell)
- Inferno Dragon (hard counter, bait removal)
- Skeleton Army (swarm bait)
- Dark Prince (support, splash)
- Tornado (pull and cycle)
- Zap (defensive stun)
- Spear Goblins (cheap pressure)
Bait decks sacrifice consistency for explosive advantage trades. When your opponent wastes Fireball on Inferno Dragon, the Golden Knight and Goblin Barrel become nearly impossible to stop. This list requires precise timing and matchup knowledge but absolutely crushes decks that lean on area-damage spells.
You’ll want to ladder push with this only if you’re confident in spell bait mechanics. Against random matchups, it feels chaotic. But in the hands of someone who understands baiting and timing, it reaches 7000+ reliably.
Golden Knight + Golem Beatdown
- Golden Knight (secondary attacker)
- Golem (primary tank)
- Baby Dragon (splash support)
- Electro Giant (tank backup, air killer)
- Tornado (defensive pull, spell cycle)
- Zap (defensive stun)
- Fireball (spell coverage)
- Inferno Dragon (vs opposing Golem/Pekka)
This is the greediest list in this section. You’re hard-committing to long-cycle beatdown pushes, often playing defensively for the first minute. But when you establish double Elixir and stack a Golem push with Golden Knight behind it, most mid-ladder decks simply cannot defend. The Golden Knight’s dash ability keeps the stack moving forward even after your opponent places multiple units.
Expect a lot of overtime games. You’ll occasionally face Inferno Dragon counters or spell-heavy lists that reset all your momentum. But pure beatdown doesn’t exist at ladder anymore without the Golden Knight as a secondary condition.
Card Synergies And Combos
Support Cards For Maximum Effectiveness
Splash Damage Units (Wizard, Executioner, Baby Dragon)
These cards are the backbone of every functional Golden Knight deck. The Golden Knight absorbs enemy damage while splash units clear the swarms attempting to counter it. Baby Dragon is your cheapest option at 4 elixir, trades well against air threats, and leaves trail damage behind. Wizard costs 5 but has higher initial impact against ground swarms. Executioner at 5 elixir is beastly against Mega Knight and other heavy targets but requires building around his slow projectile speed.
The synergy is straightforward: Golden Knight pushes, splash clears the defenders, and you’re essentially winning the trade on resources every cycle. Playing these together on the same push is overkill unless you’re in double Elixir and have the space for it.
Small Rotation Units (Skeletons, Goblins, Ice Spirit)
These are your deck’s circulatory system. They’re cheap enough to deploy repeatedly without disrupting your Golden Knight cycle, and each one forces your opponent to make defensive choices. Skeleton Army baits spell commitments, Goblins distract defensive buildings, and Ice Spirit stuns high-impact threats or resets your Golden Knight’s timer if needed.
The math is brutal for opponents. If you’re cycling Skeletons every 25 seconds and deploying Golden Knight every 45, your opponent either matches your cycle perfectly (inefficient) or falls behind on resources. Most players don’t manage this correctly, which is why cycle Golden Knight lists punch so far above their weight.
Common Synergy Pairings
Golden Knight + Electro Dragon
Electro Dragon’s stun ability is underrated with the Golden Knight. When Electro Dragon stuns a building or defender, the Golden Knight gets a free dash into an unresponsive target. Together, they pressure both air and ground lanes, and Electro Dragon’s massive damage output means your opponent can’t ignore it. Run this pairing in control or tempo decks where you want flexibility without committing to pure beatdown.
Golden Knight + Hog Rider
This split-push combination forces your opponent to choose which lane to defend. Neither card is powerful enough to guarantee a tower takedown alone, but defending both simultaneously is resource-prohibitive. The Golden Knight applies steady pressure while Hog Rider cycles in and out of range. Opponents either sacrifice one lane or overextend defending both, creating counter-push opportunities.
This pairing works best in cycle and tempo lists where you’re rotating cheap units frequently. Clash Royale Strategy: Master Winning Tactics for Ultimate Victory – Pixelhearth covers split-push mechanics in greater depth if you want to refine your understanding of multi-lane pressure.
Golden Knight + Inferno Dragon
This is your “we’re going to out-trade you” pairing. Inferno Dragon handles heavy tanks while Golden Knight applies consistent pressure and baits spell commitments. If your opponent plays Fireball on your Inferno Dragon, the Golden Knight becomes nearly impossible to answer without a second card. If they ignore Inferno Dragon, you’re free-cycling pressure while they lose to your tank interactions.
This works exceptionally well in bait and control lists. The matchup advantage against Golem and Pekka decks is massive. You’re essentially forcing them to choose between answering your win condition or losing to yours.
Gameplay Strategies And Tactics
Positioning And Placement Tips
Lane Selection And Pressure Timing
Deploy your Golden Knight in the lane where your opponent is least equipped to respond. If they’re showing Inferno Dragon or a ranged building in the back, pressure the opposite lane. If their spell response is on cooldown (you just made them Fireball a Goblin Barrel), deploy your Golden Knight immediately. Timing is everything, an early Golden Knight deployment when your opponent has 7 elixir and limited answers generates massive advantage.
Avoid deploying both Golden Knight and support simultaneously on the same lane during single Elixir unless you’re committing to a massive push. One-elixir swing trades are where you accumulate advantage. Deploy Golden Knight, let your opponent respond, then support if the push is rolling. This prevents overcommitment and keeps you ahead on the cycle.
Dash Placement Mechanics
The Golden Knight’s dash ability resets when you redeploy it. This means the first hit after placement is always a dash, guaranteeing first-strike damage. Position it so the dash connects with the most threatening defense your opponent has, a building, a swarm, or their primary counter. The dash damage adds up faster than you’d think, and it forces defenders into awkward timings.
During gameplay, use the Golden Knight’s natural movement toward enemy towers. Don’t waste the dash on random units: you can let the Golden Knight walk through skeletons. Save dash momentum for actual threats. If a Pekka is incoming, move the Golden Knight slightly out of the direct path so it dashes through the Pekka rather than wasting the ability on a small counter unit.
Elixir Management And Timing
Single Elixir Cycle Strategy
During single Elixir, you’re not stacking units or committing to large pushes. You’re cycling through your deck, making small, efficient plays, and cycling back to your strongest cards (Golden Knight, win conditions). When you deploy Golden Knight, immediately rotate into a cheap cycle unit. This resets your deck rotation, ensuring Golden Knight is available for your next opportunity.
If your opponent plays a high-elixir card (Golem, Pekka), you’re not matching it on offense. You’re defending efficiently, cycling, and preparing a counter-push. The tempo advantage comes from converting defensive elixir into offensive pressure once you’ve stabilized.
A practical example: Opponent plays Golem for 8 elixir. You respond with Inferno Dragon (4 elixir) and skeletons (1 elixir). You’re ahead 3 elixir and have the Golem isolated. Now you cycle into Golden Knight and apply pressure on the opposite lane where they can’t defend. They forced themselves into an elixir deficit by overextending offensively.
Double Elixir Aggression And Push Building
Double Elixir changes the entire dynamic. You stop cycling defensively and start committing to larger pushes. Stack the Golden Knight with splash support. Add secondary threats if you have elixir. The goal is to apply such overwhelming pressure that your opponent can’t mount a counter-push before you’re breaking towers.
Common double Elixir sequencing: Deploy Golem or primary tank, support with splash, add Golden Knight once the initial push forces spell commitments. By the time your opponent is ready to counter-push, you’re already defending their threat while your push rolls forward. This is where beatdown decks genuinely dominate, the sheer resource commitment required to stop double Elixir beatdown Golden Knight pushes is massive.
Don’t panic if you take chip damage during single Elixir. As long as you’re cycling efficiently and maintaining card advantage, you’ll have plenty of time to secure a tower break once double Elixir hits. Many newer players force early pushes and lose to natural counter-pushes. Patience is the meta in the current patch.
Countering Popular Golden Knight Decks
Defensive Cards And Strategies
Hard Counters And Direct Answers
The most reliable hard counter to Golden Knight is Inferno Dragon. It tanks the full duration, drains the Knight’s health pool, and threatens devastating backline damage. Inferno Dragon decks punish Golden Knight because they offer a clean elixir trade while creating immediate counter-push threats. If you’re running a Pekka or tank-heavy deck, Inferno Dragon is non-negotiable.
Electro Giant is also viable, though it requires careful positioning to avoid supporting your opponent’s next push. Against beatdown decks, planting the Electro Giant directly in front of the Golden Knight forces it to switch targets or dash around it, both scenarios waste its momentum. The downside is Electro Giant’s predictability: opponents can bait its placement with cheap units.
Skeleton Army and Goblin Gang create pure swarm scenarios that overwhelm the Golden Knight’s DPS. Golden Knight deals 185 damage per swing, but it takes multiple swings to clear a full Skeleton Army. By the time it’s done clearing, your supporting splash damage should have arrived. This is why control decks pair Golden Knight with Wizard or Executioner, they handle the swarm answers.
Pekka directly opposes Golden Knight in terms of role. Pekka costs 7 elixir but wins straight-up fights at the bridge or in the back. The downside is Pekka’s vulnerable ramp-up time and its weakness to ranged units. Pekka works as a defensive answer in Pekka-control decks but isn’t a universal counter.
Meta Decks That Counter Golden Knight
Inferno Dragon Control
Inferno Dragon control decks have resurged specifically to counter the prevalence of Golden Knight at higher ladder. The basic structure mirrors standard control: Inferno Dragon as the primary defensive tool, splash support for swarms, and chip damage from ranged units. Against Golden Knight decks, you’re essentially playing a passive defensive game, cycling until you land an Inferno Dragon that denies their win condition, then counter-pushing with cheap threats.
These decks are grindier than ever. Expect 2-minute games where the first major push to connect wins. Golden Knight decks still function, but they require more precision and better resource management to overcome Inferno Dragon’s consistent answers.
Spell-Heavy Control
Deck lists running Pekka, Inferno Dragon, and multiple spells (Fireball, Rocket, Log) punish Golden Knight’s relatively modest health pool. The theory is simple: Golden Knight becomes just another threat to be answered with a spell rotation. If you’re facing double spell answers (Fireball + Rocket), the Golden Knight push doesn’t generate sufficient damage before being reset.
These lists are less popular because they’re less versatile, but they completely dominate Golden Knight mirrors. If you’re climbing and seeing frequent Golden Knight opposition, transitioning to spell-heavy control for 5-10 games is genuinely the meta counter.
Swarm-Based Control With Tornado
Tornado-based swarm control creates a completely different defensive paradigm. Instead of hardcounter units, you’re grouping enemies together and splitting their damage output. When the Golden Knight dashes through a Tornado-clumped group of your units, it hits multiple targets simultaneously but takes full swarm counter damage in return.
Skeleton Army, Goblin Gang, and Minion Horde all function better against split defense when bundled with Tornado. This creates a playstyle where you’re using air support (Minions, Flying Machine) and ranged units to pressure while Tornado handles the Golden Knight lane. It’s less reliable than Inferno Dragon but more flexible across multiple matchups.
Dark Elixir Deck Clash explores advanced defensive mechanics that include Tornado-based strategies in greater depth if you want to understand these timing-dependent interactions.
Common Mistakes To Avoid
Overcommitting With Golden Knight Without Backup
Deploying Golden Knight into an unsupported lane against an established defense is a resource leak. You’ll frequently see newer players drop Golden Knight in the back, expect it to solo-carry the push, and watch it get distracted by a single Goblin Gang or counter unit. The Golden Knight performs best with support, splash damage, distraction units, or secondary threats.
Correct play: Deploy splash support or rotation units first, then add Golden Knight once your opponent is forced to respond. Let their defensive commitment dictate your support additions, not the other way around.
Cycling Into Golden Knight Too Quickly
In cycle decks, the temptation to deploy Golden Knight every 30 seconds is high. Resist it. Cycle the card back into your hand, yes, but only deploy it when you have a tempo advantage. Deploying it constantly into a prepared defense is feeding elixir to your opponent’s counter-push setup. The potency of cycle decks comes from selective deployment, not continuous pressure.
Effective cycle play means cycling to have Golden Knight available when your opponent makes a mistake, not deploying it preemptively.
Misreading Dash Timing And Placement
The Golden Knight’s dash ability is directional. If you position it incorrectly, the dash can whiff entirely or waste itself on irrelevant targets. Newer players frequently dash into Skeleton Armies when they should be saving the dash for a building or high-priority threat. Each wasted dash is equivalent to ~200 free damage your opponent gets.
Practice positioning so the dash connects with your intended target. Zoom in during ladder matches if needed to see exact placement zones. The dash is your primary advantage, treat it as premium currency.
Ignoring Your Opponent’s Counter Rotations
If your opponent just played Inferno Dragon, deploying Golden Knight into it immediately is a losing trade. If they just used Fireball on your Goblin Barrel, they’re likely cycling into another spell answer, wait for that rotation to cycle before deploying on the same lane. Tracking your opponent’s answers and deploying around them is the core difference between mid-ladder and top ladder.
Write down or memorize your opponent’s rotation. If they Fireball you at 5:30 in the game, they can Fireball again around 4:50 (depending on their cycle speed). Don’t deploy directly into that rotation window.
Playing Passively When Ahead on Elixir
Many Golden Knight players achieve a 2-3 elixir advantage and then… stop applying pressure. They cycle, they defend, and they let the opponent catch up. Aggressive gameplay when you’re ahead accelerates your win condition. If you’ve stabilized a Golem push and you’re sitting at 7 elixir while they’re at 4, deploy that Golden Knight. Force them to respond from a deficit, and you’ll compound your advantage.
This doesn’t mean reckless overstacking. It means pressuring when your opponent has limited answers, not when they’re at full elixir with counter-push setup waiting.
Conclusion
The Golden Knight remains the most versatile and impactful card on mid-ladder and competitive Clash Royale in 2026. Its combination of survivability, burst damage via the dash ability, and compatibility with virtually every deck archetype makes it the centerpiece of meta climbing strategies. Whether you’re grinding ladder, preparing for war, or just looking to climb out of your current trophy range, understanding the card’s mechanics, synergies, and deployment windows directly translates to trophy gain.
The meta has evolved around the Golden Knight, but that evolution hasn’t made it less dominant, it’s made it more skillful. Distinguishing between efficient and wasteful Golden Knight placements, cycling correctly in pressure situations, and reading your opponent’s defensive rotations separates decent players from ladder threats. Your climb isn’t guaranteed, but having a deep understanding of your primary win condition certainly stacks the odds in your favor.
Start with the mid-ladder domination decks if you’re new to the card. Master the basic synergies, learn how your opponent defends, and then experiment with more specialized lists. The payoff is worth the investment. Golden Knight decks are genuinely rewarding once you’ve put in the practice, and they’ll carry you far higher than you might expect.